Probiotics! I started buying kombucha many moons ago while browsing the aisles of Whole Foods Square One when it first opened. With an array of supposed health benefits such as improved digestion and absorption of nutrients, strengthening immunity, to name a few, I was curious enough to try it and soon developed a taste for it. It was sweet, but not too sweet, and naturally fizzy – a healthy alternative to some of the sugary drinks that I crave now and then. Unfortunately, it always seemed too expensive to drink regularly, especially since kombucha is just basically sugar-sweetened tea, fermented with bacteria and yeasts. Megan and I used to make it, but not consistently. Now, with a new shared goal of trying to make everything ourselves, we have started brewing new batches every 8-12 days.
Ingredients:
- 480g organic cane sugar
- 6 organic tea bags (we used organic green tea bags because we find that the flavour is better)
- 3.5L water (filtered, if possible)
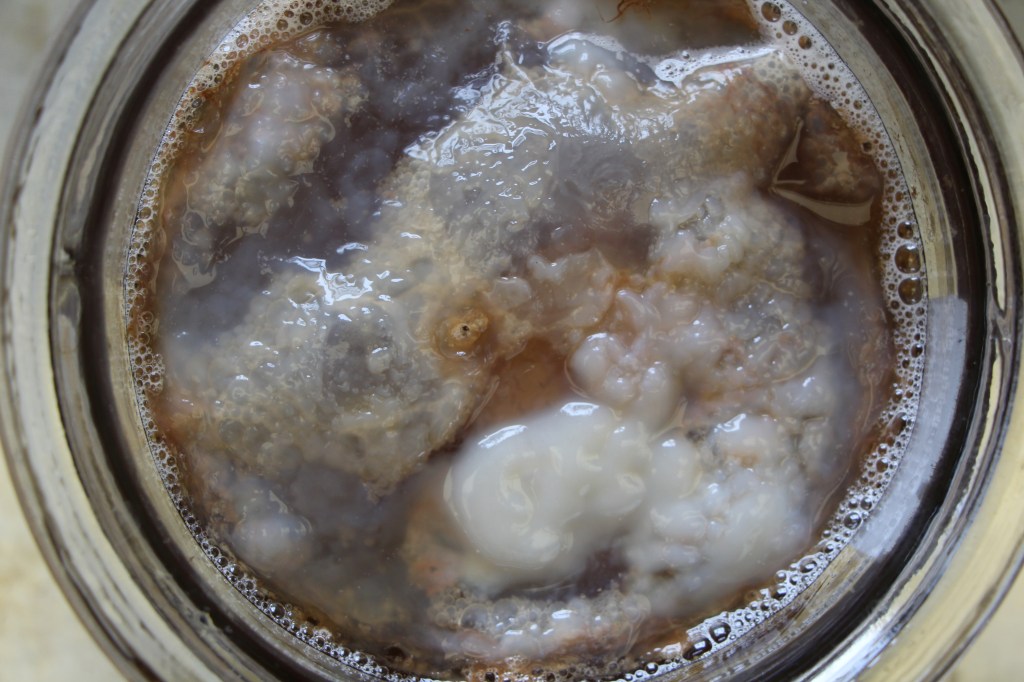
- 1 Scoby/Mother (should at least cover 25% of the surface of the container you’re fermenting in)
- 400g starter liquid (mature kombucha)
Tools Required:
- Glass (or other non-reactive material) jar with a 4L+ capacity
- Stainless steel pot
- Natural soap
- Glass bottles for bottling
- Tea towel or cheese cloth
- Rubber band
- Gloves
Instructions:
- With clean hands, wash all equipment with natural dish soap (you want to avoid using harsh chemicals where some residue might hurt your Scoby).
- Pour 480g of water into a pot, add sugar to the water and bring water to a boil.
- At 80°C, remove sugar/water from heat, add your tea bags, and steep for 10-15 minutes.
- Remove the tea bags.
- Pour sugar/tea mixture into the glass container, along with the remaining water.
- Add your Scoby (ugly/non-smooth side facing down) along with the starter liquid. Wear gloves for this step if you’ll be transferring it with your hands.
- Once everything is added, cover your container with a tea towel or cheesecloth, pulling it snug with a rubber band around the mouth to keep it from falling in / off. If you are very forgetful like me, make sure to label the container with your start date or mark it on a calendar.
- Leave it in a dark place and allow to ferment for 8-12 days, depending on temperature of the environment. It is best to ferment at or near a warm spot in your home (not hot, but not below room temperature).
- After the recommended time of fermenting, you should taste to see if you are fine with the sourness/sweetness. If you are happy, you can start bottling your kombucha. If it’s too sweet, let it continue to ferment for another day or two, then test again. If it’s too sour, there’s not much you can do (sorry!) but make a note and reduce your length (or temperature) of fermentation next time.
- If you wish to flavour your kombucha you will do that now, before moving onto the second fermentation. (See Variations below for more on this) *** Note: Make sure you leave some room in your bottles for any add-ins.
- Once the kombucha is flavoured, close the bottles tightly and allow them to ferment for another 2 days at room temperature.
- After 2 days, move your kombucha to the fridge and store until ready to drink.
- You can either make a new batch right away after bottling, or store your Scoby along with some of its fermenting liquid in the fridge until a new batch is made. (See On Scoby storage, below)
Variations:
- You can use different teas (black tea, green tea, white tea, pu-erh, or other styles of tea. You can brew the tea strong or weak, as a preference. Note: stay away from Earl Grey and other heavily scented teas since it may affect the fermentation due to the essential oils).
- You can use fresh/dry herbs, fruit/vegetable juices, typically these items are added during the second fermentation.
- You can use other sweeteners such as honey, agave, maple syrup and even fruit juices. Note: A general guide is roughly 113g of sugar per litre of water, but you can adjust sweetness as desired.
- In the Noma’s guide to fermentation, they suggest some interesting flavours like coffee, lemon verbena, roses, and even fresh juice/pulp like apple and mango. They have also experimented with dairy, tree saps and stocks made with chilies. We haven’t gotten that adventurous yet though!
- Avoid using citrus like lemon and lime since it will be too acidic and inhibit fermentation.
- Some sources suggest that you can pan fry extra Scoby or caramelize it to make some “Scoby candy”. Megan and I have tried some of these ideas for ways to use extra Scoby, but we were not big fans. For now, we are just going to stick with the drink.
FAQs, Tips, Troubleshooting:
On cleaning: To remove soap residue, you can wipe any contact services with an apple cider vinegar to reduce any chance of destroying/harming your Scoby.
On equipment: Avoid using plastic as chemicals in the plastic can leach into the kombucha while fermenting. Avoid using metals since the container may corrode in the presence of acid. Wear gloves to protect the Scoby from you. There might be natural oils or chemicals from soap or moisturizer that you use on your hands.
On brewing: The Scoby cannot survive temperatures more than 60°C. Our method of fermentation will never get to that point, but just to be safe, make sure that the tea is not too hot when you add your Scoby.
On Scoby: Scoby is an acronym for “symbiotic culture of bacteria and yeast”. For a Scoby to survive and thrive, it needs 3 things: a place to live, food to eat, and oxygen so it can breathe. The size of the Scoby added to the ferment can vary, but you want to cover a minimum of 25% of the surface area of your liquid.
On bottling: the point of the second fermentation after bottling is to allow the “fizz” to build up in your kombucha. If you skip this step, you can still drink it but it won’t be quite as fizzy. On another note, if you find yourself short on time or and don’t feel like bottling, you can always halt the fermentation by freezing the kombucha.
I’m starting a batch of kombucha with a Scoby from a friend. What do I do if I don’t have mature kombucha? The main role of the mature kombucha is to bring down the pH of the initial brewed tea. If you don’t have any kombucha on hand, you can mix 2 tablespoons of vinegar to one litre of water and add the same amount as you would mature kombucha (i.e., 400g in the above recipe).
My Scoby isn’t floating after a few days. Will it still make kombucha? If your Scoby doesn’t float and does not develop a new film that means that it is no longer viable. It won’t make kombucha and you should discard it (and the contents) and get a new one.
My Scoby is getting thicker and thicker. What do I do? There are no additional benefits from having a thicker Scoby, so share your pet with friends and family.
On Scoby storage: If you are not fermenting, Scoby should be kept in the fridge with fermenting liquid, but eventually it will need some food. You can maintain your Scoby (kind of like a sourdough starter) by keeping it in a 20% sugar syrup solution. How much syrup? Twice the weight of the Scoby. Because the Scoby is a living thing, it will continuously convert the sugar into ethanol and then acetic acid, and needs to be transferred to a new home every few weeks.
On fermentation: Since brewing kombucha is an aerobic process (which means it needs oxygen to ferment), you don’t want to seal your fermentation container completely. This is why we recommend using a cheesecloth or a towel to cover the opening.
On tasting: If possible, pour kombucha out to taste instead of reaching in with utensils like a spoon to avoid contamination. For this reason, it’s nice to ferment in a jar with a spigot. Also keep in mind that unlike a vinegar, kombucha will continue to convert sugar into ethanol for the bacteria to convert into acetic acid even after you put it in the fridge. This means that even after bottling, it will become slightly more sour over time. It’s not good forever! Make, enjoy, and repeat! You can also test the pH level of the kombucha to ensure a consistent level of acidity each time.
