 At the end of last year, Royce and I welcomed the latest (and possibly heaviest) addition to our library: Modernist Bread. We had been looking forward to this moment for more than a year, and thankfully we were not disappointed! The breadth and depth of this thing is overwhelming! We weren’t quite sure how to begin — for now, the plan of attack is to make at least one recipe per week and meander our way through the recipes and techniques. While the size is intimidating, the content – thankfully – is not. Currently, we’re in the sourdough section and we’ve been having a ton of fun with the variations!
This one is carrot cake inspired (duh)! It’s also our very first contribution to an ingredient-focused food blogger collaboration — we are joining a collection of food bloggers to share recipes that highlight the carrot! Carrot cake is one of my favourite cakes that I never hardly ever eat. It’s also one of those cakes, with sickly sweet icing or cake, that is frequently disappointing! 😦 😦 😦 But you know what’s not disappointing? Bread! Especially bread with our new favourite, best-ever sourdough recipe (from our new favourite, best-ever bread book!)! This recipe uses carrot juice instead of water, and includes walnuts and raisins. The carrot juice results in a beautiful orange-coloured crumb that is faintly sweet. It’s good eaten in a multitude of ways (we have tirelessly been researching this, trust me!) but most fun to eat with cream cheese for the complete carrot cake experience!* We opted not to add any spices so that it would be a little more versatile, but if you want to go all out carrot cake, I’d recommend adding a little cinnamon, too. I am also betting that the basic carrot sourdough (sans inclusions) would be pretty fantastic with caraway too!
*please do this!
Disclaimer(s): I had my own levain, or sourdough starter, going into this. This one I originally started and maintained (roughly) according to the directions in Tartine (vol. 3 I think). We call him Chad. If you don’t have one, there are a ton of resources out there on starting your own. Something to be aware of is that different recipes will produce stiffer or firmer levain, and this will have an impact on your final result. Personally, I like to keep a more liquid levain as I find it easier to maintain and mix in. This is also the type that is used in the modernist bread recipes recipes. I feed Chad with equal parts flour and water (specifically: 25g levain + 50g bread flour + 50g whole wheat flour + 100g water). It’s recommended that you feed your levain at the same time every day, alternatively you can slow the fermentation by storing it in the fridge. I do this with Chad and only have to feed him once a week; and this works out perfectly with our new, weekly bread-baking-regiment! One final thing — a guideline we found to be helpful is to aim to feed your levain 12-18 hours before mixing into the dough. This means that if you’re storing it in the fridge, you’ll want to take it out a day in advance to feed before starting on your dough! (We usually take at least 2 days from the initial mix to baking, so that translates to at least 3 days before you want to have your finished loaf.)
Recipe (Adapted from Modernist Bread)
Ingredients
480g bread flour
315g carrot juice
195g liquid levain
10g wheat bran
1g malt powder
12g Fine salt
Inclusions
87g walnuts (15%)
58g raisins (10%)
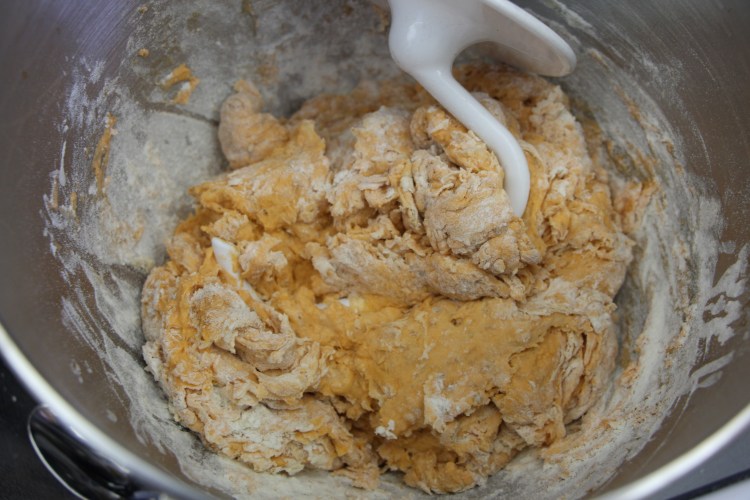
1. Mix the first group of ingredients (without the salt, and inclusions) into a shaggy mass.
2. Autolyse** for 30 minutes.
**Fun fact about autolyse: Autolyse occurs when flour is hydrated by the water which allows for gluten development and the break down of starches, converting them into sugars. Why do we do it when this process will occur anyways? This process will reduce kneading time. This is good because too much kneading will oxidize the dough, changing its overall flavour, texture, and colour.
3. After 30 minutes, add salt and mix on medium speed with the hook attachment for roughly 5-7 minutes, or until medium gluten development*** is reached.
***Fun fact about medium gluten development: At medium gluten development, the dough should just tear when stretched as for (i.e. almost passing) the windowpane test.

4. Fold-in all of the inclusions by hand. Don’t worry if there are loose pieces, this will be taken care of when you do the stretch and folds.
5. Bulk ferment the dough for one hour. After one hour, stretch and fold from all four corners of the dough. Let it rest again for another hour, and repeat. Rest for another 30 minutes after the final fold. Weigh the dough, and divide in half.
6. Preshape, then rest for another 20 minutes.
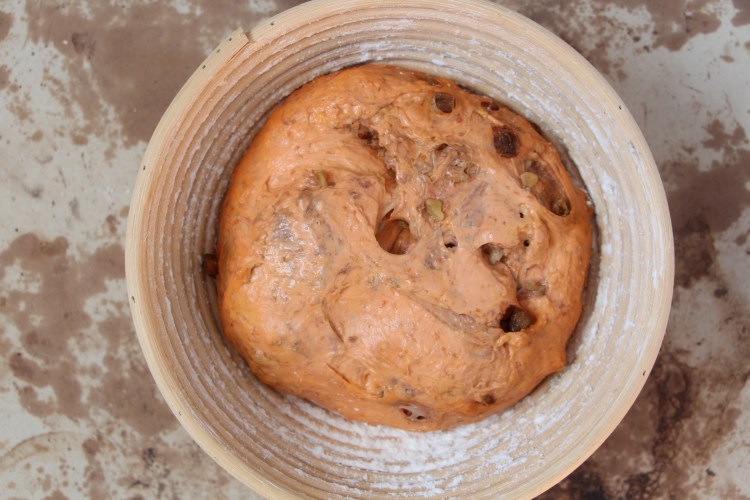 7. Shape the dough and rest dough in lightly floured bannetons in the fridge overnight (12-16 hours****).
****Fun fact about this final timing: The dough can stay in the fridge for up to 72 hours. So don’t let that bread run your life, bake whenever you want!
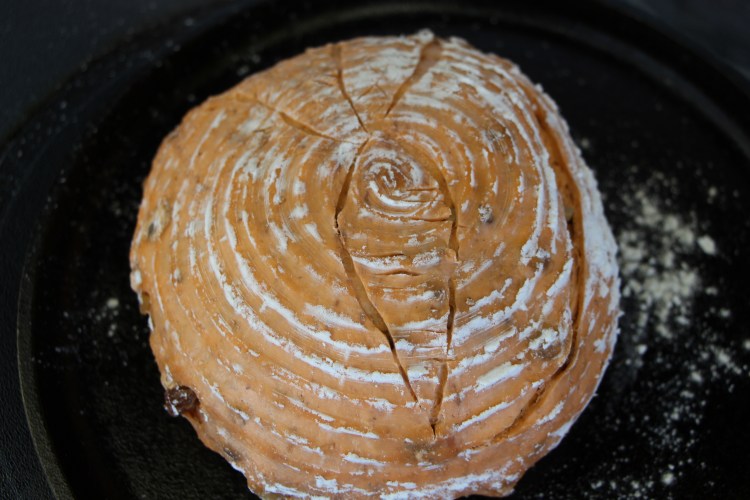
8. Preheat oven to 500F. Score the loaves and reduce the oven temp to 475F as soon as the loaves are in. Bake for about 40 minutes total. We use the cast iron combination method described in modernist cuisine: an inverted cast iron pot to act as the lid, and a shallow cast iron pan to act as the base (an oven inside an oven!). With this method, the baking time is approximately 30 min with the “lid” (cast iron pot) on, then another 10 with the lid off. If you don’t have a cast iron pot, or have another preferred method of home bread baking, feel free to use what works for you!

His and Hers. To practice our scoring, we usually bake two loaves.
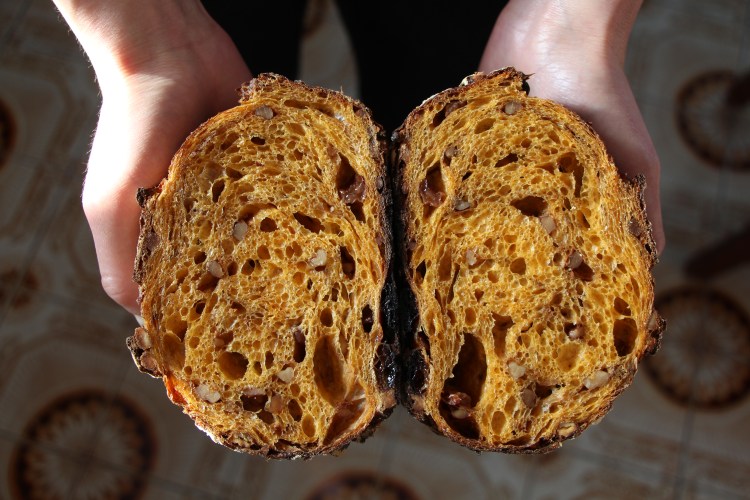 Obligatory crumb shot!

Fantastic.
LikeLike