
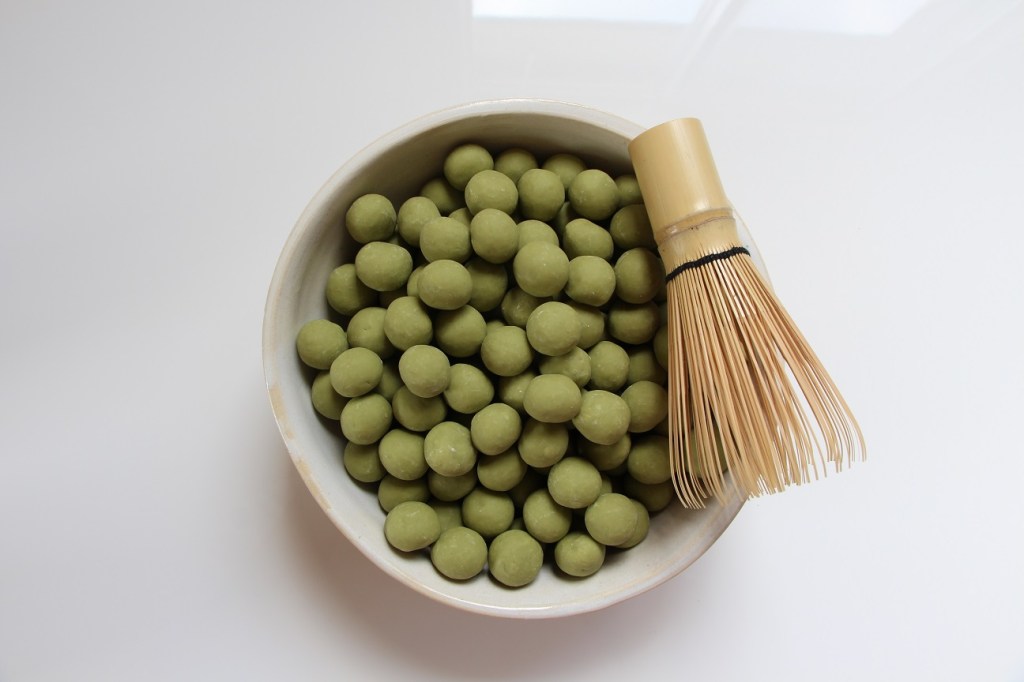
Panned Items or Dragees. Panned products or dragees are a type of confectionery that typically has some centre wrapped with chocolate, rounded, and often times finished with a hard candy shell. They have become increasingly popular in recent years. Pastry chefs around the world are tumbling anything and everything in chocolate. No longer will you be limited to chocolate-covered almonds, peanuts, and raisins that come in small packages called Glosettes. Nowadays, pastry chefs and chocolatiers are panning things like cereal, puffed grains, toffee, gummies with various flavour combinations and finishing them with different colours, creating a sophisticated version of the treat we all know and love. However, taking something that is done in the commercial world and trying to refine it, a few issues arise:
1) Public perception. Why would I pay $12/jar for chocolate covered raisins when I can buy Glosettes? Many consumers may not be aware of (or care about) the differences: 1) We use high-quality ingredients and sustainable chocolate. 2) We pan in smaller batches, not done autonomously with machines.
2) Time. There are limitations to the batch size since we are using small tabletop panners. For something small like coffee beans, it takes as long as 4 hours just to get it to the right size.
3) Money. Unless you’re buying hundreds of kilos, nuts and high-quality chocolate can be quite expensive.
4) Lack of knowledge. We are still missing some trade secrets to get the ultimate shine. It’s also sometimes preferable to avoid the use of commercial finishes like a shellac (made with crushed up beetles – not everyone’s cup of tea!).
5) Exposure to resources. Glazes and polish are sold by 18L pails with a relatively short shelf life. Since the amount required per batch is quite small, it doesn’t make sense to buy them since we’ll need to throw most of it out.
6) Co-packing. Outsourcing the production to a third party can help to resolve some of the above challenges, but this raises the question: is it artisan any more?
How did Megan and I learn? When we were first looking into this back in 2014, there were many places that you could find classes: Montreal, Las Vegas, Chicago, Paris…But this would mean buying a plane ticket, booking a hotel, etcetera, on top of the enrolment for a class that usually runs in the area of $800-1000. Never mind the cost, if we are going to take the time off to go to these gourmet food cities, do we want to spend 8+ hours a day listening to the sounds of chocolate tumbling in a drum banging around, or would we rather spend all day exploring pastry shops and seeing what food the city has to offer? No brainer, right? So Megan and I opted out for a more budget friendly solution: to stay local and learn from someone we knew, Kerry Beal, aka The Chocolate Doctor (also an MD in real life) and owner of EZ temper. With a quick Facebook message, we made our way to Kerry’s workshop just a small drive out of GTA.
Equipment. Most importantly, you need a panner. They come in various sizes, the bigger the panner, the more product you can make, (keep in mind it’s based on volume and not by weight). The issue with getting a small panner (one that I got the students of my high school to machine), is that you are limited by the size of the cavity, and depending on the volume of what you are enrobing, the end results may vary. For hobbyists like us, we bought one from Design and Realisation that attaches to a stand mixer. Along with a heat gun, small AC unit or other means of cooling the cavity (see FAQs below), a spatula, some roasted nuts, and chocolate, we were ready to tumble!


Let’s get started! There are basically 3 components to panning: 1) the centres being enrobed or engrossed, 2) The type of chocolate you choose to enrobe with, and 3) Your finishing: natural, powdered, polish + shellac, or cocoa butter (for a natural shine).
Centres. First, you need to decide on your centres: what you want to cover in chocolate. When choosing your centres, there are a few factors to consider. From our experience, it’s much easier to enrobe something that is round versus something rectangular or irregularly shaped. For example, hazelnuts are much easier to do than orange peels. The smaller the centre is is, the more chocolate you’ll have to add; the more flat sides it has, the more likely it is that the centres will stick to one-another producing doubles (aka doubling). If you are covering nuts, you will likely want to seal the centres with a gum arabic solution to avoid any fat migration. To start panning: Place the things to be enrobed in the cavity of your panner and start the machine on the lowest setting.
Enrobing/Engrossing. Next, you will need to decide what kind of chocolate to use (and how much). Once the centres are sealed, add chocolate at 40°C, one ladle at at time. Gradually add more warmed chocolate – the centres will start out clumped in larger masses with the chocolate, then as the drum continues to turn they will begin to separate into individual pieces. As more of the centres separate, the loud noise in the drum will get louder. So Listen! The ideal temperature for the cavity should be around 17°C in order for the chocolate to crystallize as it coats the centres. Throughout the stage of adding more chocolate to your panned items, if at any point, the cavity becomes too hot, you will need to cool it down a bit (more on cooling methods in the FAQs) . Stop adding chocolate once you get to the desired size (usually 3:1 for almond, malts balls 4:1, rise crisp 6:1, coffee beans 10:1). It is then time to round the panned items: heat is applied to the drum so that the outer chocolate layer softens and the panned items start to round by with the friction between themselves and the drum wall. The heating process will also help to clean off any chocolate stuck to the wall of the drum as it will soften and be picked up by the panned items as they round. Finally, you can remove your items from the drum: cool them and let rest on a tray for at least a few hours or overnight.
Finishing. Once you have covered your panned items with chocolate and they have had time to rest, you have two choices – to polish or not to polish. If you are looking for an artisan appearance, simply leave it as is or spray with alcohol then add a powder finish. With a powder finish, the panned items are unpolished, and then may be tossed in something like cocoa powder, icing sugar, spices, or freeze-dried fruits and starch. But if you like the bells and whistles and want to go for the full on “Glossette look”, you need to polish. This can be done with a natural gloss or with polish and shellac. A natural gloss may be achieved with the addition of cocoa butter and a process of heating and cooling. When polishing with shellac, multiple dosages of polish are applied at different intervals with and without air to adjust the temperature. If the environment is too warm, it won’t shine; if it’s too cold, it will crack. Aside from that, the ambient temperature inside the cavity, relative humidity and the speed of rotation of the panner will also affect the final result. Once the polish has a glossy finish, you need to seal the gloss in with an alcohol based shellac. After polishing and glazing your product, it should be stored in a controlled environment for a minimum of a few hours to ensure that the product remains glossy.
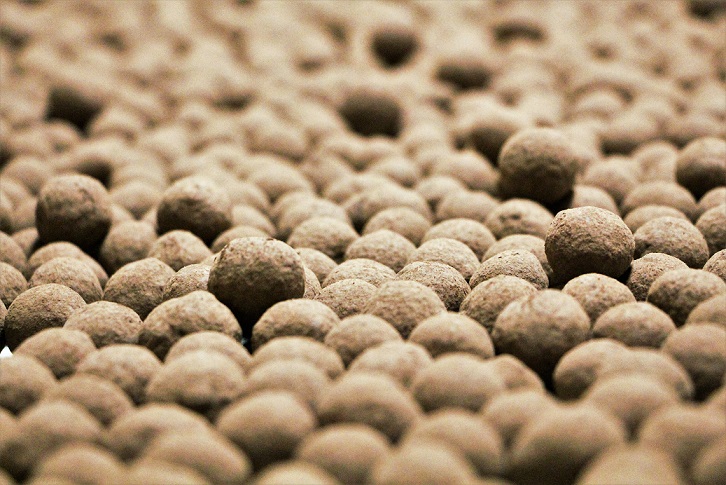
cocoa powder finish 
polish + shellac 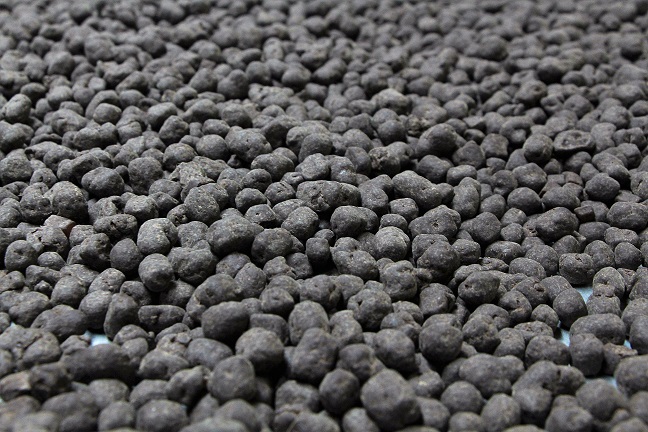
cold air only

FAQs, Tips, Troubleshooting:
- Just like chocolate, you need to be aware of your atmosphere (ambient temperature will affect the amount of time for the chocolate to crystallize and relative humidity will affect the gloss if you are publishing)
- The amount of finished product will be based on the volume of centre and the amount of chocolate you are adding in (too little won’t pan properly, too much and it will spill out of the panner)
- The speed of the rotation matters – with my stand mixer, we find that on stir is enough (lowest speed possible)
- The temperature of the cavity matters – too hot and it will take longer to crystallize, too cold it won’t have a nice round finish (unless you want it to be textured)
- To prevent fat migration from your centres – use an arabic gum solution to seal your nuts before you start adding chocolate
- Choosing the right chocolate – fluidity and viscosity will play a role and should be considered when selecting
- Attention to detail – it takes time (and patience) and you need to pay attention to avoid any doubling (especially when you are using centres with flat sides)
- Try to remove any excess powders or bits (e.g. small pieces of nuts) when adding your centres – so that you don’t end up with smaller panned items without centres

Hi i did the workshop
But now i need to buy this machine ,from where i can get one and how much it cost. When i can receive it am from UAE
As a mouselike country what is the alternative polish product i should to use rather than alcohol (not allowed in Islam to use it )
LikeLike
Hi do u have online class for making dragees
LikeLiked by 1 person
Sorry, we don’t offer online classes, but would love to answer any questions you might have though.
LikeLike
Hi, thank you very much for this precious informations. Since now I’ve only produced dragèe tossed in cocoa powder, but now I would like to make it shiny, I’m trying to polish my chocolate dragèes, but I only have the alcohol based schellac, that I think, is very final step.
Which product should I use to polish them in the panner? Thank you in advance! Liliana
LikeLike
Hello Liliana, you are correct. The schellac is typically used in the final step as a sealant. In terms of polishing, you would need to apply a gum arabic/ starch solution.
LikeLike
Thank you so much, I’ll try with a gum arabic syrup made with 60% of water and 40% of gum arabic, and hope this will work! 🙂
LikeLike
How tto use starch solutions can u please explain ?
LikeLike
Our first time panning, and the chocolate had a nice temper but the hazelnuts only rolled for the first chocolate addition, then just stuck to the sides. Help!?
LikeLike
THIS IS A VERY INFORMATIVE ARTICLE,,THANK YOU SO MUCH.HAVE U A BOOK SPECIALLY FOR CHOCOLATE AND SUGAR PANNING
LikeLike
No, there are no specific books for chocolate and sugar panning. They are usually included in a section of confectionary books. With that being said, I think I found a pdf through google search that was quite helpful. Please let us know if you have any more questions, we’d love to help.
LikeLike
have you ever tried to add more chocolate to an item the next day?
LikeLike
Sorry for our late response, haven’t been active for some time.
Yup, you can typically pan one type of chocolate, let it crystallize and do it again with another the next day. It creates a beautiful cross section when you cut into it.
LikeLike
What is a arabic gum solution ?
LikeLike
Sorry for the late response, we haven’t been quite active.
The gum arabic solution is 1 part gum arabic solution to 2 parts warm water by weight. Mix together and leave overnight, skim off any impurities and you can use it from there.
LikeLike
hi
thank you for the very informative article
I’d like to avoid the gloss but would like to have the powder finish but with colour
How do you suggest to go about it? I don’t wish to use coloured white chocolate as the final layer
Also you mentioned using alcohol for the powder finish. Could you plz share what kind and what percentage ?
LikeLike
So so sorry for our late response. You can use (1) alcohol or (2) the same gum arabic solution (at 1%) before you add your final powder finish. You can also (3) just use the heat gun to melt your chocolates slightly in the clean up stage. In terms of a percentage of powder finish, I can’t tell you how much because its all based on the surface area of what you are panning but typically, I just save the excess for further panning. I hope this helps.
LikeLike
This is a great resource – thank-you for taking the time to make it!! I am in the process of starting to make chocolate coated macadamia nuts using the panning method. I understand that the nuts (that have been lightly roasted) should be sealed using a gum arabic solution but can you tell me how to make this solution? Is it the same as the one you have suggested for the polishing above – i.e. 1 part gum to 2 parts water? Also, when sealing, do the nuts just need to be covered completel or is there a suggested ratio to use e.g. 100ml/kg etc? Many thanks!!
LikeLike
Hi Michael,
To answer your first question – yes, the solution used for sealing is the same as the one used for polishing.
Second – the solution should be applied in two applications for sealing: 1st application is 1% by weight, and the 2nd is 0.5%. Hope this helps, and sorry for the late response (we are enjoying our second baby this year)!
LikeLike
Hi I am interested in purchasing this machine for my business and would like to know if there are any classes I can join I am able to travel and do the a short course to get the knowledge please can you let me know when and where I can go for the courses.
regards Abdulhakim Abudena
abudena2017@outlook.com
LikeLike
A few that we know of (though we haven’t taken the courses ourselves) are: Melissa Coppel and a Chocolate Academy near you (they have locations around the world).
LikeLike
please how much qwantity to pour gum arebic liquid on dragees and how much time gape in every batch og gum arebic liquid for glaze or shine
LikeLike
For shine, apply the solution in 3 stages: 1st 0.3% by weight, 2nd 0.2% by weight, 3rd 0.1% by weight. The panned items should no longer feel sticky before you move on to the next application.
LikeLike
How to prevent worms from cashew and almond Because they keep coming back even after heating them before panning
LikeLike
That sounds more like an issue with the quality of the nuts you’re selecting, not with the panning process itself.
LikeLike