The idea of growing your own sourdough starter from just flour and water is something that many people shy away from. Maybe the idea of fermenting something at home is intimidating or unappealing; maybe it seems too risky or complicated. Whatever the reason, it’s a shame because the process itself is actually quite easy, and the starter can be used to yield wonderful results in the kitchen! In any case, the point of this short post is to dispel those nasty rumours and let you know that with a little patience, you can make your very own sourdough baby completely from scratch!
There are many resources available on this process. For the most part, they all boil down to roughly the same thing: (1) mix some flour and water (2) let sit several days until something starts to happen (bubbles! life!) (3) begin regular feedings, allowing it to develop and mature (4) use, and (5) continue feeding forever and ever, ’til death [1] do you part.
It’s been a while since either Royce or I started a sourdough from scratch (Chad – named for Chad Robertson, whose book I used when I first started baking sourdough, is quite a few years old now; and the school’s sourdough starter, Madras – named for the takeout container she was born in, was grown from Chad). Nevertheless, we do get questions here and there on how to make a sourdough starter from scratch, so I’ll try to give a bit of an overview on the process here. Basically, with the flour and water mixture you’re creating food for wild yeast (and bacteria – the good kind!) that is already floating around in the air. Think of it kind of like a trap (a nice trap). Once you catch the yeast, it will start eating and growing in the mixture. Unless you’ve accidentally contaminated the mixture (i.e. dropped some other junk in there), it will naturally begin to cultivate the yeast and the good bacteria — you don’t have to worry about it getting mouldy (bread magic!).
Start with 112g room temperature water, mix in 56g whole wheat and 56g a.p. flour, (make sure your flour is not bleached). You’ll want to do this in a container that has room to spare for when your starter becomes active (I think roughly 3-4x the volume of the original size).
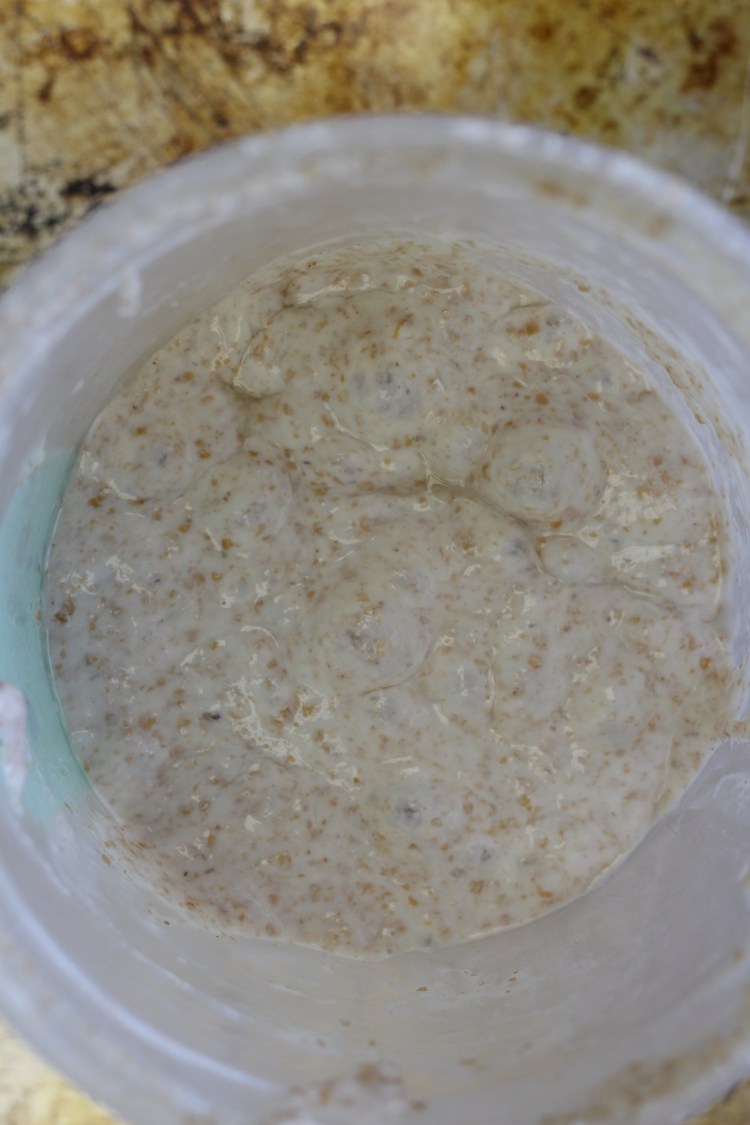
Catching the wild yeast and bacteria: Let the mixture sit at room temperature, covered with something that will allow air in but keep bugs and debris out (a cheesecloth works well). After a few days, you should start to see some activity. The exact amount of time will vary depending (mostly) on the environment (ambient temperature, etc). If you don’t see any activity after a week or so, then something is probably wrong. Time to consult one of those resources [2] I mentioned!
Feeding (cultivating) your new (yeast and bacteria) baby: The bubbles you’re witnessing are a sign that you’ve captured some wild yeast, and it’s eating some of what’s in the flour-water mixture. To keep it alive, healthy, and strong, you’ll need to continue to feed it on a (semi-)regular basis.
To feed the starter: scale out 25g and discard [3] the rest. You’re now going to feed that starter 50g whole wheat flour, 50g a.p. flour, and 100g room temperature water [4]. Continue on like this every day to develop a strong starter. You’ll see it becoming more active over time, and you can test its strength by dropping a bit of it in water to see if it floats (“the float test”); that’s an indication of how active it is (how much air it’s producing) at any given point in time. Once your starter is fully developed (it should pass the float test), you can start making bread! Note that your starter’s activity will fluctuate after each feeding, so some recipes will even give you an optimal “age” of sourdough to use.
Think of your starter as a pet. They like to be fed regularly – the same thing at the same time of day. In the Tartine book they suggest pre-mixing your 50:50 whole wheat/a.p. flour blend. I never found much value in that (I just scale out equal parts whole wheat and a.p.), but I guess it could be handy if you end up feeding your starter once or twice daily. Even though you’ll (likely) want to be using bread flour to bake with, your starter should be fed with a.p. rather than bread flour — this is its food of choice.
Having said all this, if you don’t have the patience for this process (no judgement!) remember that the quickest way to get started is to adopt a starter from someone else. You can skip all the cultivation and just continue with regular feeding. Don’t be shy –anyone who maintains a starter probably has a lot to go around!

One thought on “Growing your Own Sourdough Starter (levain)”